
OPTIMIZE YOUR USER EXPERIENCE!
Creating Tool Libraries in Mastercam
Creating your own Mill Tool library in Mastercam is an easy task that can make your programing more efficient. Using the tools for which you already defined and tested the feeds and speeds to increase productivity. You can create a separate library for each machine tool in your shop or for sets of machines that use similar tools.
1. Creating a New Tool Library with the tools used to program a part.
The easiest way to start a new tool library in Mastercam is to use the tools from the programed part file. While you program the part you can use tools and holders from Mastercam libraries or you can define new tools or import them from tool manufacturer websites as dxf or step files. The preferred feed rates and spindle speeds can be set in the Edit tool, Finalize Properties page.
To learn more on how to import a tool from a tool maker website, click here.
Once you have the part programed with all the tools and holders defined you can open the Tool Manager. The Tool Manager is divided in two sections: the Part window in which you can see the tools used to program the current file and the Library window in which the current Mastercam library is shown.
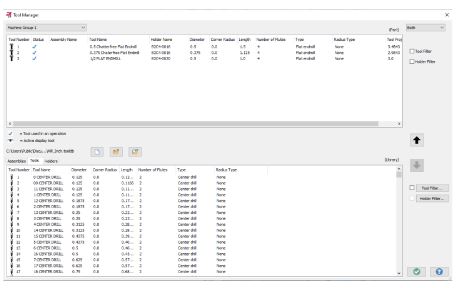
NOTE: When you create or work on a tool in the part window, you are working on a copy of the tool definition that is stored in the machine group. That means if you edit a tool from the part window, you are only changing the definition in the machine group and not in the tool library. If you create a new tool, you need to save it or copy it to the tool library window to make it available
to other Mastercam files.
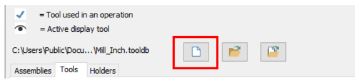
To start a new library in the Tool Manager, you have to select the Create a new tool library button.
You can name the new library as wanted. In the Part window you can then select all the tools and use the down arrow to copy them into the new library. Save the new library when prompted.
2. Create Tool Assemblies in Mastercam.
The Tool Assemblies can be created in the Tool Manager. In the Part window, right mouse click and select Create tool assembly to open the Mill Assembly Designer. First you should add a tool. You can choose to define or import the tool from a library. Then define or import a holder. You can also add a component above the tool, like an extension. Furthermore, Mastercam allows you to edit the tool extension.
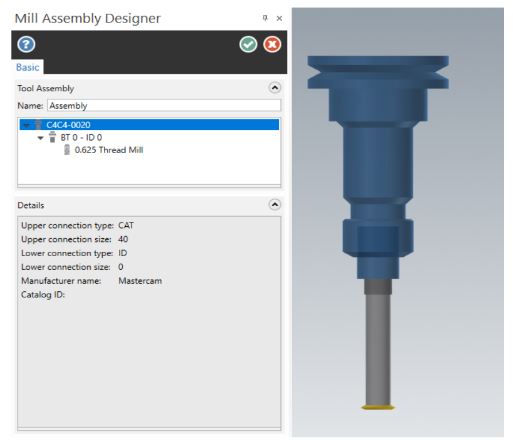
To learn more how to create a Tool Assemblies click here.
To learn more about Mastercam and its capabilities, check out our Mastercam Product page


